SET PATH=x:\os2image\disk_1;x:\os2image\disk_2;%path%
SET SOURCEPATH=<X:\os2image > <Enter>
SYSINST2 <Drive_letter:\directory_containing_OS/2_installation_tree > <Enter>
Where X: = drive letter of partition containing OS/2 installation tree. If SYSINST2.EXE can't be found, it is in \os2image\disk_2
(Hopefully) You will see that OS/2's setup screen
will show. If not, some files from OS/2 install_disks 1 & 2 must be added (I'll have to find out which ones).
Follow the instructions; be sure to format the OS/2 Warp partition
as HPFS and to specify VGA as the screen driver.
BEWARE! As soon as the first reboot
occurs, first boot from the maintenance partition and run the files from
the GT2GBW3 archive, to be sure that OS/2 can boot from the newly made
partition. Probably OS/2 boot manager will be instructed to boot your new Warp partition immediately and you'll be stuck with a black screen with a blinking cursor. No problem, just press the three-finger salute CAD.)
After the first reboot, the Selective Install screen is shown. On the Main menu (= actually Hardware menu, although it doesn't explicitly say so), add PCMCIA support (any Toshiba or Matsushita will do), plain VGA, no Multimedia, maybe a simple text printer or no printer at all, and no (repeat: no) brand of sound card or the like. On the next screen (= actually Software menu, again not explicitly), install Multimedia Support and all other options you like.
From then on, installation proceeds
easily.
Hardware
Warp Connect and plain Warp 3 ran on
my Libretto 110CT quite OK with:
- Matsushita or Toshiba PCMCIA Socket Services
(IBM2MAT1.SYS or IBM2TOS1.SYS). It may be useful to know that many PCMCIA cards (especially external storage) are only properly recognized if inserted in the lower (first) PCMCIA slot. Surely this is an OS/2 limitation, as in Windows or Linux the slot number does not matter at all.
OPL3 sound driver from the Toshiba
web site (P660SND2.EXE) for Portege
GRADD driver for video, but you'll
have to apply fixpak 40 before installing that anyway.
NICs:
- I got an old Xircom CEM33 PCMCIA 10Mbit LAN/33K6 modem combo; drivers can be found on Internet, runs like a charm but 10 Mbit/s half duplex is not fast. To get it working I had to manually specify "Force Twisted Pair = YES" in MPTS. Furthermore, to allow other PC-cards to be recognized properly, it had to be in the upper slot. This is without doubt due to the point enabler software used to get it running.
- A second NIC is a Conceptronic 10/100 card. It only works OK in WIndows; in Linux it renders the entire PCMCIA subsystem unstable, under OS/2 I haven't got it to work. It has a RTL8139 chip, I've tried Veit Kannegieser's cbenabler software but no luck.
- Later I got an IBM EtherJet Cardbus 10/100 card, which is indeed quite a bit faster. Turns out that the moron who packed the drivers for Win31, DOS and OS/2 made them Windows InstallShield executables, which can only be expanded under Win32(!). Why this dumbass made it an installer rather than a zip file, and then only able to be expanded in another operating system than what the drivers were intended for is beyond me. In a text editor the IBMCNDIS.OS2 driver reads "This program requires Microsoft Windows" (....)
All right, it works, but newer drivers can be obtained from Intel/Xircom for the 10/100 Cardbus credit card adapter. After unpacking some files are patched and drivers for Xircom, Intel and IBM cards are obtained, proving that the IBM Etherjet Cardbus 10/100 adapter is just a rebranded Xircom card.
Anyway, to get this Cardbus card recognized the BIOS setting for the PCMCIA slots must be set to "16bit/Cardbus". A little problem then is that all other PCMCIA cards won't get recognized as the socket drivers (IBM2TOS1, IBM2MAT1, TPIC95SS) won't get loaded. I haven't been able to get the IBM Etherjet card running with PCMCIA BIOS setting to "Auto".
- Nowadays I have a Cisco Aironet 352 wireless NIC to access my wireless network (truly mobile computing!). The driver (cisco340.zip) can be found on Hobbes, too bad it only allows 40-bit WEP keys.
On the Canadian Toshiba web site there is an archive with some old
OS/2 2.1 drivers - perhaps these can be used on the Libretto,
I haven't tried.
External data storage:
I've got three PC-card CD-ROM players/rewriters, several CF cards and an external hard disk cradle. Additionally there's a parallel ZIP100 drive collecting dust.
- An (now ancient) PCMCIA Argosy PMCIA 6X CD-ROM is working flawlessly through its own driver (ARICD2.FLT).
- A Freecom Traveller I CD-R/RW rewriter; it works quite OK with the DANIS506.ADD and DANIATAPI.FLT drivers.
- Recently I purchased a Freecom Traveller II+ Combo (CD-R/RW&DVD-player). It works only under Windows, not even under Linux. No hope to get it running under Warp...
- CF cards are recognized, initialized and readable/writable using the DANIS506.ADD driver. No problem.
- Finally there is an Argosy external 2,5" HD cradle with a PCMCIA interface (and a USB one, but my Libretto has no USB). Sometimes it is recognized using the DANIS506.ADD driver and proper OS2DASD.DMD parameters, but up til now I could only access the HPFS partitions. It may be that the PARTFILT.FLT driver (for access to FAT32 partitions) is in the way -- it is known to be buggy.
- Although I haven't tried recently, I know that the parallel ZIP 100 drive can be put to order with drivers from Hobbes. I have got it running at one moment, IIRC 4 years ago or so.
Fixpak installation
An important thing to do as soon as possible after installation of Warp itself is to apply FP40 to the newly installed Warp. This procedure is easily done as follows:
- Make sure that the fixpak files are expanded
(using LOADDSKF) and put in a directory tree on the maintenance partition;
Make sure that the service diskettes
(currently at level CS1.43) are expanded into the same directory;
Setup a RESPONSE.FIL file (instructions
for FSERVICE) as follows (where in this example the fixpak directory tree
resides in E:\OS2FP40 - fill in *full* pathname incl. driveletter on your
computer):
* :LOGFILE C:\OS2\INSTALL\SERVICE.LOG
* :FLAGS REPLACE_PROTECTED REPLACE_NEWER
:FLAGS REPLACE_PROTECTED
:SOURCE E:\OS2FP40
:SERVICE
:SYSLEVEL D:\OS2\INSTALL\SYSLEVEL.OS2
:ARCHIVE \ARCHIVE
:SERVICE
:SYSLEVEL \MMOS2\INSTALL\SYSLEVEL.MPM
:ARCHIVE \ARCHIVEM
*
* End of sample SERVICE response file
without backup.
Type: FSERVICE /<params>
At first, Warp will seemingly do little
or nothing, but after a while (up to 10 minutes or so) it will one by one
update almost all system files. You MUST however KEEP the IDEDASD files
(don't let them be overwritten!).
GRADD video driver
You will soon get bored by the 640x480
16 bit VGA screen mode. Currently the only alternative is to use the (non-accelerated)
GRADD generic video driver. I also tried the SDD driver (versions 7.04
& trial 7.09) but both couldn't be instructed to display properly in 800x480
resolution.
I also downloaded a Neomagic driver => same problem.
Even the Scitech SNAP drivers (as late of v. 2.2.3) can't be instructed to show 800x480 resolution. Worse yet, after uninstalling SNAP and reinstalling GRADD97, I initially kept the newer SNAP versions of various video files and then GRADD couldn't show 800x480. I had to reinstall GRADD again, this time overwriting all video files left behind by SNAP, to get 800x480 back....
For GRADD, it is best to have the latest
fixpak installed (FP40, the higher ones are for Warp Server not Warp 3)
and your display resolution must still be plain VGA.
Unpack / unzip the GRADD files
into a temporary directory and run the installer:
SETUP GEN
where GEN stands for "generic".
(You can also specify SETUP NM, but then you must in a later stage exchange the line "SET C1=NMGRADD" in Config.sys with "SET C1=GENGRADD" - no harm done.
I got two CONFIG.SYS versions in \OS2\BOOT which differ only in that NMGRADD or GENGRADD line and use the recovery choices screen to boot between an external 1024x768 panel -accelerated- and internal 800x480 -stand-alone, unaccelerated. I still have to find out which files must be copied in place to skip the System screen where the other resolution must be selected first. I'll keep you informed)
(Although Neomagic is listed as supported, I couldn't get it working properly with setup NM. In 800*480 resolution, the mouse pointer refused to go beyond pixel column 640 and the screen image would pan to the left and wrap around instead: look here and compare with the picture at the top of this page to see what I mean. Vertical panning worked perfectly. I suspect there are still standard resolutions (viz. 640*480) hard-coded in the accelerated driver. Admittedly, it *was* accelerated...)
Before rebooting, you must manually
add the following PRIVATE.DIF file to your C:\OS2
directory:
[Monitor]
OEMString = "DDC 2 TOS 20612"
XSize=160
YSize=96
[comment]
Graphics Mode: 640 x 480 at 60Hz vertical
refresh.
[ModeInfo]
XResolution = 640
YResolution = 480
VerticalRefresh = 60
HorizontalRefresh = 0
VPolarityPositive = 0
HPolarityPositive = 0
[comment]
Graphics Mode: 800 x 480 at 60Hz vertical
refresh.
[ModeInfo]
XResolution = 800
YResolution = 480
VerticalRefresh = 60
HorizontalRefresh = 0
VPolarityPositive = 1
HPolarityPositive = 1
[comment]
Graphics Mode: 800 x 480 at 75Hz vertical
refresh.
[ModeInfo]
XResolution = 800
YResolution = 480
VerticalRefresh = 75
HorizontalRefresh = 0
VPolarityPositive = 0
HPolarityPositive = 0
[comment]
Graphics Mode: 800 x 480 at 85Hz vertical
refresh.
[ModeInfo]
XResolution = 800
YResolution = 480
VerticalRefresh = 85
HorizontalRefresh = 0
VPolarityPositive = 0
HPolarityPositive = 0
Next, reboot, and in the OS/2 System
\ System Setup folder doubleclick on "System", select "DDC 2 TOS 20612"
monitor and on the next page select a suitable 800x480 resolution &
color depth. You have to reboot to try and test it.
INSTALLATION OF NETWORK COMPONENTS
Next the network section of Warp Connect
needs to be set up.
Put the NDIS (NDIS2) driver for your
network LAN adapter (I assume a PCMCIA-, nowadays called PC-card adapter)
in a temporary directory on your hard disk.
In case you got a PC-Card without
OS/2 drivers, it is wise to search the Web using e.g. Google
- look for e.g., "OS/+2 NDIS LAN adapter <brand name>". Especially a
number of Russian and Hungarian sites contained usable drivers.
Would you have a RTL8139 based PC-Card
LAN adapter wih a suitable OS/2 NDIS driver, please inform me as I have
been desperately looking for it ;-)
On the Warp Connect CD you'll find files called PRODINST.CMD and INSTALL.CMD. The former allows separate installation of network components, the latter will install a complete network environment.
If you selected PRODINST.CMD, after installation of Peer and TCPIP you'll need to configure networking adapters. On the desktop or in the OS/2 System folder you'll find an MPTS icon. Click on it, click "Configure", and in the next screen select "Configure LAN adapter". In the following screen you must first select your LAN card ("Have disk").
Once the LAN adapter is selected, you
must bind the required network protocols (e.g., NetBios, LAN requester,
TCP/IP, etc.). When that is done, click "OK"; in the next screen (which
you've seen before) you now need to select "Configure NetBios" in case
you have bound that protocol to your network adapter, otherwise click "Done".
NetBios merely comprises setup of network names and a unique name for your
computer. MPTS will try to update your CONFIG.SYS - on my system it didn't
work out OK, I had to manually fix up my CONFIG.SYS. Once MPTS is finished,
it may be time for a reboot.
Beware that a number of card brands
(e.g., Xircom) do not need socket services but instead use a so-called
point-enabler. You might need to disable the card slot where your network
card resides, e.g.
BASEDEV=IBM2TOS1.SYS /IG0=2
disables the upper slot (the second,
#2). Mind you, it is a zero not an O in IG0!
Next step is -if needed- to setup TCP/IP.
TCP/IP setup is found in the Network icon on the desktop.
Then it is time to reboot and check
if the network can be reached: open an OS/2 command prompt and try to ping
other computers on the network.
Updating
the TCP/IP stack and utilities
Although OS/2's naming might deceive
you, it is the TCP/IP stack which is updated by MPTS upgrades. The
TCP/IP utilities are updated through TCP/IP fixpaks. You need to
successively update MPTS by applying the following fixpaks, either through
FSERVICE (from a maintenance partition) or through MPTS itself:
WR08423
WR08425
WR08610
WR08621
TCP/IP upgrades are available up till
level UN2100 (16 bit); real 32 bit can only be achieved if you patch the
relevant SYSLEVEL files to deceive FSERVICE into thinking you got Warp
Server rather than Warp Connect. But you can also try to manually unpack
the fixpak files and copy them over the respective files in the TCP/IP
directory; I've already unpacked them but never tried - my network is running
OK so why should I change it? Again, much information can be found on the
Warpupdates
site. Relevant fixpaks are (in order of application:)
UN0959
UN0980 (to
be applied before WR08621 above, and again after having applied WR08621!)
Once you've updated the TCP/IP stack
and util, you might consider upgrading other Warp Connect components, too.
These comprise IBM Peer, LAN Requester, AskPSP, ...
Optional: NFS
NFS is a very efficient protocol and very fast (even with 16-bit utils still twice as fast as NETBEUI between my Libretto and my desktop). Apart from a quite easy Linux - OS/2 + Windows file sharing, it also allows to avoid NetBIOS over TCP/IP (TCPBEUI) which may eliminate some risks of file sharing across the Internet - OTOH, NFS is not that safe either and you must be sure to run a firewall and to properly set up your NFS exports.
Regarding NFS on Warp Connect one has to resort to the UN57064 stuff from IBM (a very busy server, you might need to retry often) or from Hobbes. This NFS Kit can easily be installed on top of Warp Connect's network stuff, but beware: specify \TCPIP rather than the default \MPTN install directory, otherwise your NFS won't work! (at least, that's what IBM suggested in an old TCP/IP Newsletter. I did by accident install it in \MPTN and found that until now all stuff works as expected ...) In addition, you'll need an updated NFSD.EXE and NFSCLIENT.EXE (grab one here or here (look for PN69745.zip - a free download if you use ZOC for Telnetting into the BBS).
Note: one can still download various 32-bit TCP/IP utilities for Warp Server etc. Although they can't be installed using the regular way (one or more of the syslevel files have to patched for that) one can unpack them and manually copy the utilities into place. Some day I'll try them out on my Virtual PC Warp Connect box.
OTHER INTERESTING SOFTWARE
This department comprises:
Basic OS/2 utilities
To be able to do some useful things
under OS/2 a lot easier, a number of free but IMO vital tools are needed.
They can be found on Hobbes or Netlabs
or the IBM download site(s). These are:
- UNZIP, which is quite a vital archive
expander. It seems you had best download it here (from IBM), or
here (newer version compiled with VAC 3.08) or here (same newer version, but compiled with gcc) as only these versions have the same set of (un)compression methods built
in as PKUNZIP2 (the latter apparently doesn't fully support Extended Attributes,
so stay away from it) . Other UNZIP builds lack support for one compression
method (a licensing issue?);
(These are rumours I've read in comp.os.os2.setup.misc
and associated newsgroups; they may or may not be true, but better be warned.)
VFDISK30, a virtual floppy disk driver;
LOADDSKF, a utility to load floppy
disk images to (real or virtual) floppy. You can also use DSKXTRCT for
it, it seems to be much easier to use;
Acrobat Reader. For OS/2 the latest
version is 3.0;
The Warpin installer;
Java 1.1.8 (the highest available version
you can download for free from IBM). Look here for information on how to install it properly - the instructions are for Warp 4 but apply equally well to Warp 3;
Either
- Java
1.4.2 from Innotek (based on ODIN),
or
- Java 1.4.1 from Goldencode
(native OS/2, but not tested on Warp 3. Anyway, on
their site click on "software, select Java 1.4.1 and proceed by clicking
on "Licensing");
Netscape 4.61 browser and plugin pak;
File browsers like MrFilePM and MC;
Henk Kelder's FAT32 device driver,
allowing you to access your Windows FAT32 drives.
EMX
EMX is a Linux emulator for the OS/2
platform. It is needed for various useful programs. Look on Hobbes and
download the latest version (currently as of September 2003 it was 0.9d or
so). You can follow the instructions in the ZIP file for installation.
Odin
ODIN is an emulator (or better, an interpreter) which allows 32-bit Windows programs (Windows 95 and up, not Windows 3.1) to be run seamlessly
under OS/2 Warp. Although Warp 3 is not supported, ODIN can be run on that
platform; some fiddling around is needed.
Why run Windows programs? As the ODIN
people say, "some good programs have been written for the Win32 platforms",
and I do agree with them. Pity those programmers ignored OS/2.
Why not? Well, because this way, viruses
for the Win32 platform now can also harm OS/2 Warp. As ODIN runs at Ring
0 (the most privileged level of the OS/2 kernel), harmful programs cannot
effectively be shielded. You might need to install and run an OS/2 virus
scanner and update it regularly.
Anyway, detailed instructions for installation
of ODIN on Warp 3 are outlined here.
Suffice it to say here that you might need to download quite a number of
fixpak levels for Warp 4 (yes, four) before you get hold of the proper
PMSHELL.EXE version for your language (the mentioned site features just
UK-English and DE-German). FYI, on my US Warp Connect I run a Warp 4 FP12
PMSHELL.EXE.
The latest ODIN builds can be found here.
OpenOffice
1.1
OpenOffice is IMO a real good, quite
complete office suite, and it's free. It is by no means easy to get it
running on Warp 3, but I managed to do it the following way.
I could access my Windows FAT32 C:-drive
from Warp 3 as drive E:. I booted Warp 3, fired up the Register Editor
and exported all keys to a file. I then read that file into a text editor
(e.g. Warp's EPM, Enhanced Editor) and threw away all keys which did not
relate to OpenOffice. Many OpenOffice keys feature names containing "Star",
"Staroffice", "Sun", etc. Next I did a search-and-replace action to replace
all path names in the file from e.g., C:\<some_path> to E:\<some_path>
(as OpenOffice seen from OS/2 resides on E:). Then in OS/2, I used the
Win98 registry Editor (which runs fine on Warp 3 using ODIN) to import
all the keys into the registry kept on the Warp drive (Warp's / ODIN's
registry editor is just a piece of sh....). The next action comprised making
a desktop shortcut to E:\Programs\OpenOffice.org1.1\programs\soffice.exe
and associate .xls, .ppt and .doc files to OpenOffice.
Not all OpenOffice components run as
desired (Help nor Spell Checker work, selecting languages doesn't work
either) but most functionality is useable. Hopefully it gets better with
newer releases of OpenOffice and ODIN.
In the meantime Innotek has published a beta port of OpenOffice 1.1 for OS/2. It needs two helper apps which are readily installed, but the OpenOffice setup itself does not work out OK.
OpenWatcom C++ & Fortran77
If you want to do some real developing
for OS/2, you might need this compiler. It is a free download from the
OpenWatcom site (currently version 1.2 stable). As valuable bonus this package features cross-compiling (you can develop e.g. Windows NT programs on an OS/2 platform) and OS/2 16 bit programs, which may look outdated until you realize that most OS/2 device drivers have 16 bit interfaces to the operating system.
The only other available compiler which can do this trick is the old Microsoft
one (see below). Go to the OpenWatcom ftp site and either download either open-watcom-os2-1.2.exe or a selection of the various zip files for version 11.c (which is advertised as an "upgrade" but really is an almost complete package); either way, take good care of the README.TXT.
For 11.0c you might need the IBM developers Toolkit
in addition, but that one is not free. But wait- the IBM Toolkit 4.0 upgrade
can (could?) be downloaded for free. You must first register as a guest user on
the DevCon site. Then search for os2tk199.zip and download it. Simply expand
the zip file into a proper directory somewhere and edit the various LIBPATH,
INCLUDE, BOOKSHELF and HELP statements in CONFIG.SYS. This toolkit upgrade
features almost all include files, libraries and utilities you need including
the resource compiler, save for one vital file called bseerr.h.
However, a similar file is included
in the OpenWatcom Fortran include files (it is called bseerr.fi) and you
can have it translated to c by the f2c utility. Or you can do it yourself
at the expense of some work. I used a text editor with a good search-and-replace
followed by a spreadsheet program to translate the Fortran decimal constants
into hex, but you might do it your way.
A while ago a clever programmer put
together a zip file containing many needed include files (inc. bseerr.h)
here, hopefully
you can still find it (start from there looking for archive.zip).
More information on OpenWatcom is given
on http://www.openwatcom.org.
In case you want to do some cross-compiling
for Windows, you also need Microsoft's Platform SDK. For this you must
surf to Microsoft's MSDN site
and do a search for Platform SDK (you can order one on CD). Its location
changes continuously, so once you get hold of a Platform SDK download make
adequate backup copies.
The newest version of OpenWatcom (1.2 and up) for OS/2, which seems to have a preliminary but working toolkit included.
IBM DDK online
IBM's on-line Driver Developer Kit
has recently been re-opened on a new location. For a while you could not register anymore (that has been re-enabled too), but someone
on comp.os.os2.programmer.tools
found out that you can access the library anyway using guest for both login
name and password. If I were you I'd download really all files as the site
still may close down in the near future.
Amongst others, on the DDK site you can find the old Microsoft
C compiler and their MASM assembler, with can both be used for driver development.
Miscellaneous useful software
NPS WPS
NPS-WPS (look for NPSWP182.ZIP) is a PM enhancer capable of autoraising windows (much like X-Windows) and it can provide a close button so that you do not have to double-click in the top left of each and every window anymore to close it. In addition, it has many more goodies.
Gibbon Double Click
This one transforms a click on the middle mouse button into a double-click. The program used to be shareware but nowadays you can get a registration key for free by registering at http://www.gibbon.com/.
Star Office 5.1a (look on Hobbes) is the latest version for OS/2. It has quite good support for MS-Office file formats (at least MS-Office 97). Upon acquisition of Star Division, Sun has released a public key for previous version 5.1, reproduced here (type it literally, mind case):
Company: Sun Free Download version
Key: 680A-0JH7-M60MVR-CQPD-147K
(if it doesn't work, experiment with the O's (uppercase o) - some of them may be 0 (zero's) instead.
On Hobbes some patches and updates can be found.
EZ-Play is PC-Card management software from IBM. It does not support Cardbus cards (very well), and I could only get my CF-cards recognized. None of my PCMCIA CD-ROM players could be set to work with it.
Speaking of it, Veit Kannegieser has made a PC-Card Cardbus enabler and a patch for a faulty PCMCIA.SYS (look on Hobbes). Perhaps these allow for better recognition of PC-Card mass storage devices.
I had more luck with the DANIS506.ADD and DANIATAPI.FLT drivers - they allowed me to use my Freecom Traveller 1 CD-R/RW as a CD-rewriter. I tried to get my Cardbus Freecom Traveller II+ CD-R/RW/DVD and Argosy external 2,5" HD to work, too, but no luck. I begin to think that that may be related to the DANI drivers not being able to cope with the ISA bus on the one hand where the internal HD is connected to and the PCI-to_Cardbus on the other hand where PC-Card mass storage is to be connected to .... in addition Warp 3 doesn't have very good PCMCIA support.
BATTERY.ZIP (again, on Hobbes) is a good tiny battery status indicator for the desktop.
BLACKOUT.ZIP (here) is a screen blanker (OS/2 Warp APM as shipped cannot blank the screen by itself); I run it with a command line like "Blackout -t 0 -s 4 -l -m" from the Startup folder.
HYBERNATE (here) is a package which is NOT suitable to hibernate your OS/2 Warp! (it will fubar your entire MBR!) but, when used together with APM2V1.4 it is quite useful for powering the Libretto down after shutdown (another thing OS/2 Warp 3 cannot do). Hybernate setup asks you to swap the original W3 kernel for a W4 kernel from fixpak 12 and patch that a bit, together with a few other files (DOSCALL1.DLL, PMMERGE.DLL, VW32S.SYS, IBMKBD.SYS, RESOURCE.SYS) and add ISAPNP.SNP and PNP.SYS. Of course you need a W4 license.
X-server PMX
Maybe not so very useful, but I liked it much: On top of Warp Connects TCP/IP stack one can very well run IBM's X-Windows Kit for TCP/IP V. 2.0. That used to cost $ 140,-, but you can freely access download updates and CSDs which together constitute the complete package. FWIW, nowhere in the included docs did I see a provision that one is to be a licensee of the TCP/IP 2.0 Kit; in the latest package README.1ST file, a stanza says that the product's end-of-life has been reached (already in 1997) and that installation is all at your own risk.
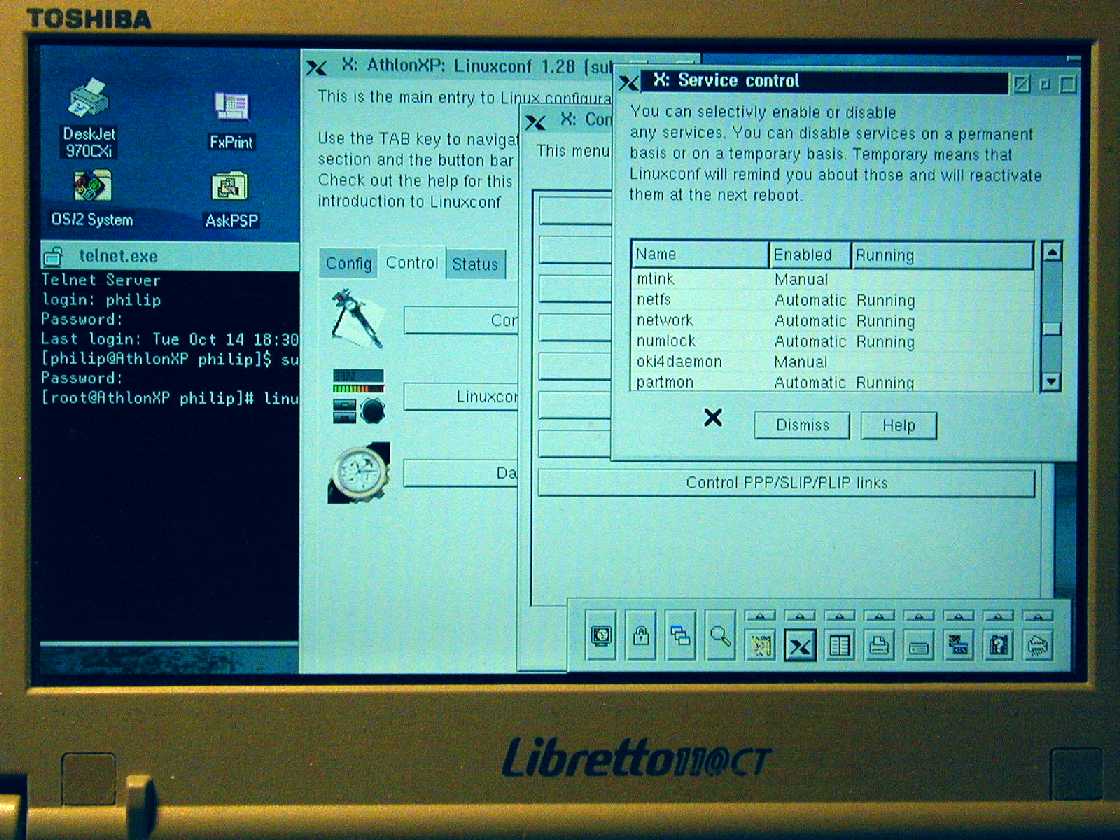
There is a more recent and without doubt better and also free X version (XFree86 v. 4.3.0) but that is always full-screen; the PMX server allows "rootless" windows, even the Linux kdm login screen (after enabling XDMCP) is just a PM screen.
OK, the stuff is a bit outdated (it is for X11 Release 5 rather than contemporary X11R6 as featured on Linux); in addition it can't handle a scroll mouse wheel. Nevertheless, I get the impression that PMX is quite a bit faster than XFree86 and better integrated into the PM desktop.
To show what can still be done, here's a picture from my Libby running Linuxconfig on my desktop through X-Windows:
 "
"
When e.g. the datafiles for an X-application are on my Lib, I mount the Lib's drive(s) through NFS on the desktop (if needed through X-Windows) and then run the CPU-hungry app on the desktop. Provided the graphics output speed of the app is not the issue, a significant speed improvement can be noted; as I do quite a bit of number-crunching with limited graphical manipulation, that provision is accounted for. Of course on the desktop PC itself things go much faster.
Download all the files in the UN59374, UN87312 and PMXFixup directories from ftp://service.boulder.ibm.com/ps/products/tcpip/fixes/v2.0os2 (keep these directories apart on your HD).
Expand all files using LOADDSKF or -preferrably- DSKXTRCT or unzip and start with installation in the order given above, using the TCPINST.EXE in each package. I read in an old IBM TCPIP Newsletter that installation should be in \TCPIP rather than the default \MPTN , but I've tried both and couldn't discern any difference. Reboot between installation of each package just to be sure.
A much easier alternative is to download the complete PMX.ZIP package from the OS2Ports.com site which is devoted to *NIX->OS/2 ports.
After installation and reboot you need to add/specify a few thingies in the TCP/IP Configuration (in OS/2 System folder):
- On the Autostart tab, enable inetd (foreground session, minimized), telnetd (Inetd super server daemon);
- On PMX tab 2 specify the automatic focus settings to your needs (I like "Move pointer into client area for focus");
- On PMX tab 3, add all the host names of the PC's in your LAN whose X-program output you want to see on your Libby's screen. On a graphical Linux desktop, virtually ALL programs are X-programs. Don't forget the host name of your Libby!
- On PMX tab 6, delete \<MPTN or TCPIP>\X11\MISCPCF from the font path (I got PMX choking on that directory being non-existent). To be sure, just add this subdirectory in the TCPIP or MPTN tree where you installed PMX. Set DHCP font path setting to "Do not use";
- On PMX tab 9, you can as well select "Turn off XDMCP" - I tried it to login to Mandrake Linux 9.0 on my desktop, but found that although the login screen (kdm) was shown nicely, all available window managers simply refused to start. No doubt that this is due to PMX being too outdated.
In addition, do the following:
- In your CONFIG.SYS, add a line:
SET DISPLAY=:0
- Reboot
- Make a desktop folder called e.g., PMX or X-Windows, add the following programs:
- PMX.EXE in \<TCPIP or MPTN>\BIN. You might make a shortcut on the Launch Bar, too;
- XCLOCK.EXE, XEYES.EXE, XHELLO.EXE, XEV.EXE;
- Fire up PMX, and when you see its window appearing, start the program XEV. It will open up an X-window and an OS/2 command window. If all went well, various instructions should be shown on the command window when you hover the mouse pointer over the X-window.
- Try the other X-programs in the X-windows folder.
- Then, you can choose to apply the updates in the PMXFixup package. I haven't yet done so, but maybe I'll try it some day. They seem to be needed only in case the installation of PMX hangs.
As an example, I'll outline how I get to run programs on e.g. a Linux PC to show up on your Libretto.
- Make sure that telnet and telnetd have been installed on your Linux box and started by inetd or xinetd (using linuxconf). To test, type in a terminal:
telnet
open <your_linux_box'_host_name>
If you see a login prompt, telnet and telnetd are working OK. If not, you'll have to sort it out (this is an OS/2 page, remember? :-) )
- Add your Libretto's host name and IP address to your /etc/hosts file (if that hadn't been done already);
- On your Libretto, add the Linux hostname and IP address to the hosts file in either \TCPIP\ETC or \MPTN\ETC (or both);
- Open an OS/2 command prompt and check that telnet and telnetd are working, using similar syntax as on the Linux box. If telnetd doesn't work, check the TCP/IP Configuration settings and try to launch it using "start inetd".
- If all looks well, reopen the OS/2 command window. First check the DISPLAY setting:
echo %DISPLAY%
If you see an empty line, check your CONFIG.SYS setting for the DISPLAY variable. In that case, you can for the time being enter:
set DISPLAY=<your_Libby's_host_name>:0
- Type: xhosts
If all is well, the host name of your Linux box should be mentioned. If not, just type
xhost <your_linux_box'_host_name>
and check again;
- telnet into your Linux box and start an X-program (e.g., xcalc, xearth, kspread (K-Office's spreadsheet) or whatever. You may see a long list of complaints in the telnet terminal, but don't worry - usually after a while the Linux program's window shows up.
- I tried XDMCP to login on my Linux desktop PC; the Linux login screen (kdm or xdm) was shown, but no window manager could be started. So XDMCP can as well be disabled I think.
- Play around with it much more!
X-suite XFree86
XFree86, the native Unix/Linux X-server, has been ported to OS/2 by Holger Veit. I call it a "suite" because it includes a.o. a window manager (twm) and much more utilities than PMX or other commercial X-servers.
In contrast to PMX and e.g., Hoblink X, XFree86 demands exclusive access to the screen; consequently PM/WPS and PM-programs will be inaccessible once XFree86 has been started. IMHO this is quite a disadvantage, it effectively limits usability of your OS/2 box to a few ported X programs and/or turns it into an X-terminal, but it may be that many other users have other opinions.
Detailed instructions can be found on OS2Ports.com. Take notice that the latest version mentioned there is 3.3.6, although 4.3.0 is also on their XFree86 ftp-subdirectory. It may be that the 4.3.0 branch on Netlabs (I can't get the %22 from the URL, remove it yourself please) is somewhat more recent as regard fixes.
I found that only version 3.3.6 could be run on my Libretto. I can give you the XF86Config files for the internal LCD screen (with a virtual 800x600 resolution) and an external 15" 1024x768 TFT panel.
XFree 4.3.0 could only start the X-server itself in 640x480 and lower resolutions; twm did not start through. The system would hang when using the above XF86Config files (actually meant for v. 3.3.6, but on Linux XFree86 4.3.0 runs OK with 3.3.6 F86Config files).
LINKS
Al Savage's Warp install notes . Very useful stuff, geared towards Warp 4 but equally well applicable to Warp 3. Admittedly a slow server.
Notebook/2 site Dr. Martinus' Notebook/2 Site. Outdated and disappeared. It contained a lot of useful info. It's supposed to be taken over by http://www.os2warp.be in spring 2004?/5?
os2warp.be, claims to become the hardware info site for OS/2
EDM, Electronic Developer Magazine for OS/2. Not updated, no more issues, but the on-line editions are still accessible.
OS/2 World.Com
OS/2 Site, an Australian site
OS/2 Voice, an electronic magazine
OS/2 E-Zine, another e-magazine (warning: Mozilla 1.4.1 and later crash on this site!)
Chuck McKinnis' NICPAK page, a collection of LAN card drivers, also PCMCIA ones
Link Everything On-line, a file repository
Warpguru's Home Page (Roman Stangl's site)
Gfd.Sys.Drv-GFD - a somewhat misty download site, but it contains a lot of rare stuff
OS/2 Files - another download site
OS/2 Super Site Just what its name says
Tucows OS/2 download site
SchnickSchnack a German download site containing rare stuff
Commercial software:
Mensys
BMT Micro
And if that's not enough, here are 830 more, nicely sorted per subject....
