Uridium - how to survive!
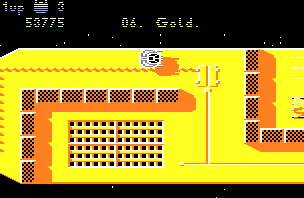
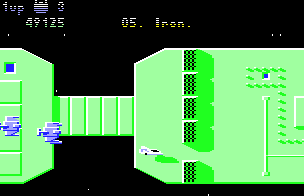
Including flightpath maps of the first three levels
Computer and Video Games, March 1986, page 42-44
So you want to know about Uridium do you?
In that case you couldn't have come to a better magazine.
As you can see we've provided you with an exclusive player's guide to the game,
created by our IDEAS CENTRAL experts,
plus hints and tips from the programming genius himself, ANDREW BRAYBROOK.
What more could you ask for?
A Manta fighter with armour like Big Red's
and firepower which packs a punch like Jackson T. Kalliber, that's what!
The Solar system is under attack!
Enemy Super-Dreadnoughts have been placed in orbit
around 16 planets in this galactic sector.
They are draining mineral resources from the planetary cores
for use in their interstellar power units.
Each Super-Dreadnought is seeking out a different metal
for its metal convertor.
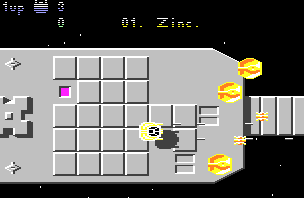 It's your task to destroy the Dreadnoughts.
First you must attack the defensive screen of enemy fighters, then neutralise
the surface defences before you land on the Super-Dreadnought's master runway.
Once on board you must pull as many fuel rods as possible
from the metal convertors before you take off for a final strafing run
as the Dreadnought vapourises.
 You are piloting a Manta class Space Fighter
which is transported to each Dreadnought in turn.
Your fighter reverses out of an interplanetary transporter
and begins a low-level strafing run.
You must avoid the meteor shields and communications aerials
on the superstructure of the Dreadnought.
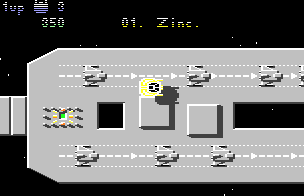
Fighter defences appear in waves.
A bonus is awarded after landing if all ships in a wave are destroyed.
You must attack surface features to score bonus points.
Beware of the homing mines which materialise over flashing generator ports -
and hunt you down.
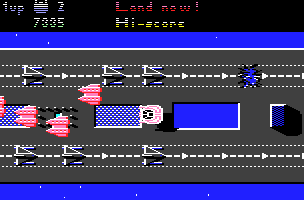
When the "Land Now" message appears at the top of the screen,
move as soon as possible to the right hand end of the Dreadnought
and fly flat over the end of the master runway from left to right.
You will automatically land and pass into the fuel rod chamber.
Here you must select your bonus or "Quit" by pressing fire at the right moment.
You must quit the chamber before the countdown at the top of the screen
reaches zero.
On take off, reverse and straf any remaining surface targets
as the Super-Dreadnought vapourises.
That about covers the basics of the game.
But what you have to remember is that Uridium is fast. VERY fast.
Don't go rushing into the attack.
Take time to master the considerable speed and manoeuvrability
of your Manta fighter - and to work out the layout of the Dreadnought decks.
Our flightpath maps will help you -
but only on the first few Dreadnoughts.
And they don't take into account the antics of the deadly defence ships
which come after you with varying degrees of nastiness.
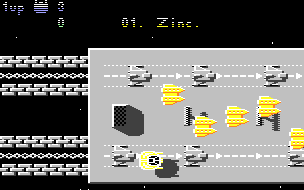
The waves of defending ships are pre-set.
So once you've watched them come at you once
you'll get a good idea of their hostility and firepower factors.
One crucial point to remember is to NEVER try and fight them from the front.
O.K., the odd lucky shot will wipe out an advancing craft - but stealth
is the watchword for a big score, so try and blast them from behind.
Perils exist if you choose this technique
because you tend to get carried away by the chase
and end up crashing into one of the many hazards on the Dreadnought.
In later stages of the game some types of defender ship will chase after YOU.
These appear around about the third or fourth Dreadnought.
Use the excellent acceleration of your Manta to get you out of trouble -
remembering those hazards on deck!
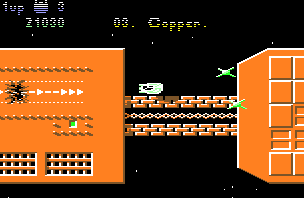
Then there are the mines.
These appear from the flashing generator ports.
Listen out for a whooshing sound followed by a tell-tale bleeping.
This informs you that a mine has been launched and is on your tail.
If you are around a generator port when a mine appears
try not to be on a diagonal line with it.
Mines are deadly on diagonals!
They only have a limited life span -
so you can dodge them if you manoeuvre around slowly.
Don't panic, you'll survive them.
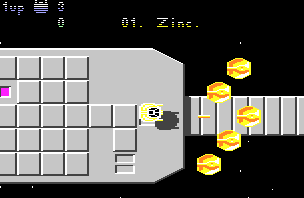
Remember there can only be six moving objects on the screen at one time -
so if there's a wave of five ships coming at you
there won't be a mine coming to surprise you from behind.
The six objects rule will help you to beat the system.
It also affects the firepower of the ships.
Say if you've knocked out two out of five,
there will be a greater chance of the remaining three ships shooting at you.
So DON'T hang around in front of them.
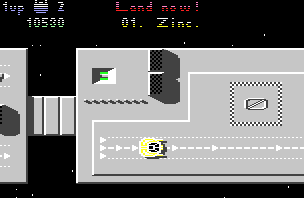
Watch out for the LAND NOW! message which flashes at the top of the screen.
Once that appears you can race for the end of the ship,
land and get into the sub-game.
Like Paradroid, Andy wanted to put something in
which gave the player a rest from all the frantic action.
This sub-game is simpler than Paradroid's -
but you'll need pretty quick reactions even so.
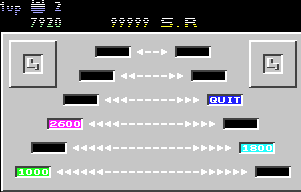
What you see is a "pyramid" of twin indicator lights which flash on and off
with a bonus score or the word "quit".
You have to press the fire button
when the indicator with the bonus score inside is lit.
This adds to your score.
But you must hit a "quit" before the countdown running
at the top of the screen hits zero.
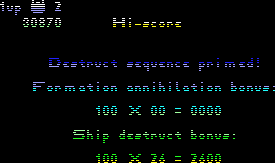
Timing is all important in this part of the game.
You have to get into the rhythm of the lights.
Try imagining that the light is moving from left to right across the screen
and that there's a "false" indicator in the centre.
Then you'll soon get into the groove.
Advanced players might like to hang around the Dreadnought's master runway
for a while to boost their score.
The Dreadnought defences throw more and more evil things at you
the longer you stay airborne after the LAND NOW! message appears.
This is a dangerous tactic - but worthwhile for extra points.
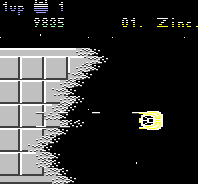 Once you've primed the destruct sequence it's back to the action.
Your Manta blasts off the runway on automatic - but you must take control
again to loop back over the Dreadnought as it dissolves into space,
blasting anything you left behind on the first run.
Andy says there are ships and installations on the later levels
that you WON'T be able to get until you're on the way back.

Your Manta fighter is extremely manoeuvrable.
It can perform neat 180 degree spins with ease.
But you must remember to leave enough room behind your ship
when you do a 180 flip - as the craft does move backwards a little.
There are times when you'll need to get out of tight spots this way.
Practice makes perfect!

You can also get your Manta flying on its side -
but you must be flying fast enough.
Too slow and your ship won't budge!
You'll need to fly on your side to get between the odd hazard
Andy has built into the Dreadnoughts.
And remember the ship has built in inertia -
so it won't stop dead or turn immediately.
Return to Uridium page
Return to main page
 It's your task to destroy the Dreadnoughts.
First you must attack the defensive screen of enemy fighters, then neutralise
the surface defences before you land on the Super-Dreadnought's master runway.
Once on board you must pull as many fuel rods as possible
from the metal convertors before you take off for a final strafing run
as the Dreadnought vapourises.
 You are piloting a Manta class Space Fighter
which is transported to each Dreadnought in turn.
Your fighter reverses out of an interplanetary transporter
and begins a low-level strafing run.
You must avoid the meteor shields and communications aerials
on the superstructure of the Dreadnought.


 Once you've primed the destruct sequence it's back to the action.
Your Manta blasts off the runway on automatic - but you must take control
again to loop back over the Dreadnought as it dissolves into space,
blasting anything you left behind on the first run.
