LineIn plugin for Winamp 2/5 Documentation - SHOUTcast setup
Up | Previous | Next | Down
What is SHOUTcast
SHOUTcast gives you the possibility of having your own internet radio station, or to receive internet radio broadcasts of course, but that's something everybody with Winamp installed can do. Broadcasting is a lot more difficult, but once you get the hang of it, it is not that difficult.
Getting the necessary stuff
First of all you need two things from SHOUTcast.com, the latest shoutcast plugin for Winamp (I will be talking about v1.8.2a) and the shoutcast server (same version), these can be downloaded from the download page on SHOUTcast.com, but the plugin is in the DJ section and the other one in the server (?) section. You might also want to download the Nullsoft Null Output plugin, which you can select while broadcasting, so you won't hear the sound (as strange as it may seem, sometimes this can be very usefull).
Furthermore you obviously need a connection to broadcast over, this can be anything, I myself use SHOUTcast to broadcast over my home network, but broadcasting over the internet is a definite possibility, although you will need enough bandwidth to broadcast a decent signal (ISDN is the bare minimum, if you would have only one or two users and are prepared to give up all of your bandwidth to SHOUTcast).
And you need some material to broadcast of course, this can be anything that can be played by Winamp (except for WMA), although you do have copyrights to wory about (especially when broadcasting over the internet).
If you want to use any external devices to broadcast from, this is the time to connect them (see the Devices section).
Some info on SHOUTcast
SHOUTcast seperates the real broadcasting from Winamp. The SHOUTcast server, which serves all of your listeners can even be installed on a different computer than the one Winamp is one (it can even be installed under Linux).
It works by compressing the sound with the DSP plugin, then sending it to the server, which then serves it to the world (or for example your home).
The setup
Quickstart
The easiest way to setup SHOUTcast is to:
- Install the SHOUTcast server (on the computer that is going to broadcast) and Winamp plugin (on the computer that is going to be used for generating the content).
- Run the SHOUTcast server (you might first want to change its settings by modifying its ini file, more on this can be found in the readme that comes with the server and the on the shoutcast site).
- Run Winamp
- Create a playlist
- Select the SHOUTcast DSP plugin and configure it (you need to setup one output and one encoder, the rest of the options can be left to their defaults), for details on this, read the readme that comes with the plugin
- Play (before you do that, you might want to select the Null Output plugin)
SHOUTcast options
There are some very interesting SHOUTcast options that you might want to know about. First of all you might want to change the password and/or port of your SHOUTcast server, the password is needed by the SHOUTcast DSP plugin to connect to the server, so if you change it in the sc_serv.ini file, you also have to change it in the configuration dialog of the plugin (the output tab).
Furthermore you might want to more carefully select an encoder setting, 128kbps 44100Hz stereo is quite sufficient for most applications, but if you for some reason need more quality you can go higher, and if you need less bandwidth consumption, you can set it to a lower setting.
And then there is the extremely interesting Input configuration of the plugin. The recommended setting is Winamp, which is a very straightforward setting, but the SoundCard can actually be very nice, although you may have to try a bit before you get it working, it will provide you with a very easy way to do voice-overs and to get crossfading working (if you use Winamp as input, the crossfading output plugin doesn't have any effect).
My plugin with SHOUTcast
My plugin can be used with SHOUTcast (old versions didn't, but newer do). This gives you some very interesting possibilities.
Using an external device
One way to use my plugin is very straightforward, just connect a stereo (or mixer, or any other external device) to your soundcard and use my plugin to input from it. This works perfectly and enables you to use any (analog) equipment you might have to broadcast over the internet.
Using external devices as well as normal files
You could make an entry in your playlist that uses my plugin and select it only when you need to, but that's not very convenient, so read on.
Using Virtual Audio Cables
I highly recommend you get Virtual Audio Cable as soon as possible, it can be downloaded from this site (click the link). Virtual Audio Cable is a great program in combination with my plugin (especially if you have the registered version, but even the trial version is very usefull).
Virtual Audio Cable enables you to connect audio applications with eachother by the means of a 'Virtual Audio Cable', it tricks the application into thinking that it is writing to a soundcard while it is actually writing to the VAC driver, and the same goes for the input, an application can input from the VAC device just as if it were a soundcard, but in reality it is reading from the VAC driver, which forwards data from writing applications to reading applications, this looks like this:
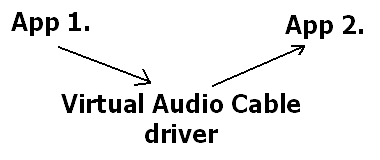
This would enable you to use crossfading, etc. just by using one Winamp to play to a Virtual Audio Cable and using another instance of Winamp to input from the same VAC (using my plugin), which opens-up a lot of possibilities.
But Virtual Audio Cables have another great feature, they can mix multiple signals, this means that you can use two (or three, or four, ...) Winamps to output to one VAC and input from that VAC with another Winamp (with my plugin), that Winamp would be using the SHOUTcast DSP plugin. This gives you incredible control over the audio, you could even use this setup to apply DSP effects to every source seperately (by changing the settings of the right Winamps) and at the same time apply a DSP effect over the whole lot (using DSP stacker on the broadcasting Winamp), the same goes for almost all of the other features of Winamp (including VIS). By using the mixing feature it is also incredibly easy to do voice-overs, just arrange one Winamp to record from the mic-in (I'm not sure wether you can use volume control seperately for each of the 'VAC writing' Winamps, but even without that you could still use other methods to control the volume).
Great software to use with the above setup are the many 'mixers' that are available for Winamp, they enable you to control the volume (and in many cases much more) of several Winamps from one window. Additionally they usually provide some easy means of crossfading between Winamps and doing other things that are difficult to do manually. My Links section lists such a mixer.
Please notice that almost all of the above can also be done indirectly by setting the input method of the DSP plugin to Soundcard, providing your soundcard has a loopback device, also it has some disadvantages, for example: you can have any number of Virtual Audio Cables (if you have a registered version), but only one loopback device (or you would have to have more than one soundcard with a loopback device).
Up | Previous | Next | Down
To contact me, please mail to: th.v.d.gronde@hccnet.nl
I hope you'll enjoy my program(s).