
 Welcome at my "C64 Emulator" web page.
May be freely used and exchanged, as long as it is not modified. You may use this product solely at your own risk. I cannot be held responsible for any damages occurring due to your using this product. You may not lease, rent or sell this product to any other party. Have fun.
[Introduction] [Getting Started] [Menu System] [Keyboard Support] [Joystick Support] [Serial Bus Adapter]
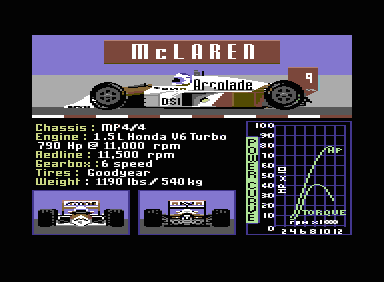
This cycle based emulator needs at least a 500 Mhz. pentium.
The generated 16 bit sound has a sample frequency of 44100 Hz. The generated screen size is 384x282 and it has a refresh frequency of 50 Hz. The joystick emulation uses the numeric keypad, analog joysticks connected to the game port and original commodore joysticks connected with some extra hardware to the parallel port.
The disk emulation is cycle based with *.D64 disk images or uses serial rom traps for faster loading from the simulated commodore 1541-II disk drive. These serial rom traps may also be used to control original commodore disk drives or printers connected to the parallel port by means of the Serial Bus Adapter.
The tape emulation uses rom traps always and works with *.PRG program and *.SEQ sequential files on the OS/2 file system and with *.T64 tape images for loading from the simulated commodore 1530-C2N datassette unit.
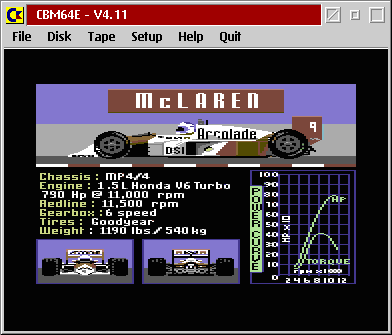
This cycle based emulator needs at least an 800 Mhz. pentium. It has no palette support so it needs a desktop with more than 256 colors. Its emulation thread runs at idle priority so may appear to be stopped when no cpu cycles are left over for its processing.
The generated 16 bit sound has a sample frequency of 44100 Hz. The generated screen size is 384x282 and it has a refresh frequency of 50 Hz. The joystick emulation uses the numeric keypad, analog joysticks connected to the game port and original commodore joysticks connected with some extra hardware to the parallel port.
The disk emulation is cycle based with *.D64 disk images or uses serial rom traps for faster loading from the simulated commodore 1541-II disk drive. These serial rom traps may also be used to control original commodore disk drives or printers connected to the parallel port by means of the Serial Bus Adapter.
The tape emulation uses rom traps always and works with *.PRG program and *.SEQ sequential files on the OS/2 file system and with *.T64 tape images for loading from the simulated commodore 1530-C2N datassette unit.
About the Author and the Product - My name is Wim Brul and I have a bachelor degree in electronics. I have worked for 25 years with IBM Netherlands and I have taken early retirement. I program as a hobby under OS/2 and for OS/2 mainly in turbo assembler and sometimes in C. I am a member of the dutch HCC OS/2 usergroup. I have developed the C64 Emulator for OS/2 Full Screen in my own time with the intention to learn assembler language in practice. I wanted to produce an emulator that would be easy to use and that is fun to play with and I hope that I have succeeded in that.
C64 Emulator for OS/2 Full Screen - This cycle based emulator needs at least a 500 Mhz. pentium. It uses the Direct Audio Real Time interface of OS/2 for sound output. It has been written using the 32-bit flat memory model of OS/2 and it descents only to 16-bit segments for direct access to the KBD, VIO and LPT functions. It has been compiled with Borland Turbo Assembler for OS/2 Version 4.1 and linked with the OS/2 Linear Executable Linker Version 2.02.001.
C64 Emulator for the OS/2 Desktop - This cycle based emulator needs at least an 800 Mhz. pentium. It uses the Direct Interface Video Extensions of OS/2 for video output. It is a direct port of the full screen version to a desktop window. It has no palette support so it needs a desktop with more than 256 colors. Its emulation thread runs at idle priority so may appear to be stopped when no cpu cycles are left over for its processing.
Legal Stuff - May be freely used and exchanged, as long as it is not modified. You may use this product solely at your own risk. I cannot be held responsible for any damages occurring due to your using this product. You may not lease, rent or sell this product to any other party.
[Features] [Installation] [Invokation]
Processor - The 6510 CPU chip and the 6502 CPU chip emulation is cycle exact. Both normal and so-called undocumented opcodes are emulated and conform to the emulator test suite provided by Wolfgang Lorenz.
Video - The generated screen size is 384x282 and has a refresh frequency of 50 Hz. The 6569 VIC chip emulation is cycle exact. Both normal and so-called undocumented features are emulated and have been implemented based on the VIC-II specifications provided by Christian Bauer and the sprite crunch deviation signalled by Ettore Perazzoli. The colors are based on a VIC-II color analysis by Philip Timmermann.
Sound - The 6581 SID chip emulation is cycle exact. The generated 16 bit sound has a sample frequency of 44100 Hz. Both normal and so-called undocumented features are emulated and have been implemented based on the resid engine of Dag Lem of the VICE/2 project.
Timer - The 6526 CIA chip emulation is cycle exact and conforms to the emulator test suite provided by Wolfgang Lorenz. The serial data register operations have not been implemented. The 6522 VIA chip emulation is cycle based and limited to the minimum functions required for a proper operation of the cycle based disk drive emulation.
Keyboard - The keyboard emulation uses an original and a national keyboard layout. The national keyboard layout conforms to the layout of the United States (103) keyboard but the emulater has been designed with national language support in mind and all language specific elements reside in the initialization file.
Joystick - The joystick emulation uses the numeric keypad, analog joysticks connected to the game port and original commodore joysticks connected with some extra hardware to the parallel port.
Disk - The disk emulation is cycle based with *.D64 disk images or uses serial rom traps for faster loading from the simulated commodore 1541-II disk drive. Alternatively these serial rom traps may be used to control original commodore disk drives or printers connected to the parallel port by means of the Serial Bus Adapter.
Tape - The tape emulation uses rom traps always and works with *.PRG program and *.SEQ sequential files on the OS/2 file system and with *.T64 tape images for loading from the simulated commodore 1530-C2N datassette unit.
Move the CBM64E411.ZIP file into a directory of your choice and unzip it:

Double click on the INSTALL.CMD file and it will create the CBM64E V4.11 folder on your desktop with the following contents:

That is all there is to it.
Open the CBM64E V4.11 folder on your desktop by double clicking on its icon:

To invoke the C64 Emulator for OS/2 Full Screen double click on the C=64 screen icon. The emulator has associations with *.PRG program files and *.D64 diskette and *.T64 cassette image files. Therefore you may invoke it directly from icons representing these files. You could also drag and drop such an icon on the C=64 screen icon. The emulator will automatically load and run the first commodore program encountered.
To invoke the C64 Emulator for the OS/2 Desktop double click on the C=64 window icon. The emulator has associations with *.PRG program files and *.D64 diskette and *.T64 cassette image files. Therefore you may invoke it directly from icons representing these files. You could also drag and drop such an icon on the C=64 window icon. The emulator will automatically load and run the first commodore program encountered.
To toggle the POPUP MENU on/off press the numpad INS key. To toggle the STATUS BAR on/off press the numpad DEL key. To toggle the serial rom traps on/off press the SCROLL LOCK key. To EXIT/QUIT press the SHIFT key first and then the ESC key as well.
[Emulator Control] [C64 Control Keys] [File Operations] [Disk Operations] [Tape Operations]
The following function keys control the emulator:
| key | function | description |
|---|---|---|
| F9 | POPUP MENU | shows/hides the popup menu |
| F10 | STATUS BAR | shows/hides the status bar |
| F11 | SOFT RESET | restarts with a reset button |
| F12 | HARD RESET | restarts like power down/up |
The following special keys control the emulator too:
| key | function | description |
|---|---|---|
| PAUSE | EMULATION PAUSE | suspends/resumes the emulation |
| PRINT SCREEN | SCREEN SNAPSHOT | writes the screen as CBM64E.BMP |
| SCROLL LOCK | DISK EMULATION | switches the serial rom traps on/off |
The screen snapshot will be written into the directory where the emulator program resides.
Various original C64 control keys are mapped to the PC keyboard:
| original | emulator | comment |
|---|---|---|
| C= | ALT-LEFT | commodore key |
| CLR/HOME | HOME | |
| CTRL | CTRL-LEFT | |
| INST/DEL | BACKSPACE | |
| INST/DEL | DELETE | |
| INST/DEL | INSERT | acts as SHIFT+INST/DEL pressed together |
| RESTORE | END | |
| RETURN | ENTER | |
| RUN/STOP | TAB |
The HELP+CONTROL pull-down menu shows this as well.
The tape device uses in reality the OS/2 file system. Only when a secondary address of 2 is used on a load operation then the data comes from the cassette present in the simulated commodore 1530-C2N datassette unit.
Running a program from FILE using the menu system - Use the FILE+LOAD/RUN PROGRAM pull-down menu to navigate through the OS/2 file system and select an *.PRG program file to be loaded and run. This navigation updates the current drive and directory of the OS/2 file system. Once the program has been selected the emulator saves the default program name internally and sets the default device number to 1 and the default secondary address to 1 and goes through a simulated power down/up sequence. After that it starts the load and run of the selected program from device number 1 and secondary address 1 by depressing the SHIFT+TAB keys together.
Rerunning the last program from FILE manually - Press the F12 key to force the emulator to go through a simulated power down/up sequence. After that depress the SHIFT+TAB keys together to initiate the load and run from the last used program name, device number and secondary address.
Running a program from FILE manually - Type the LOAD "PROGRAM",1,1 command to load PROGRAM.PRG from the current drive and directory of the OS/2 file system and type RUN to execute it. The typed in program name, device number and secondary address will be saved internally when the LOAD command is executed. Instead of PROGRAM you could use a fully qualified file name e.g. LOAD "E:/CBM64/TESTEN/VIDEO/COLORS" or even just LOAD if you wish to use the last used file specification again.
Saving a program to FILE manually - Type the SAVE "PROGRAM",1,1 command to save PROGRAM.PRG to the current drive and directory of the OS/2 file system. The typed in program name, device number and secondary address will be saved internally when the SAVE command is executed. Instead of PROGRAM you could use a fully qualified file name e.g. SAVE "E:/CBM64/TESTEN/VIDEO/COLORS" or even just SAVE if you wish to use the last used file specification again.
The disk emulation uses the diskette present in the simulated commodore 1541-II disk drive. When the serial rom traps are active the loading goes faster but fast loaders will fail. When the serial rom traps are active and there is no diskette present in the simulated commodore 1541-II disk drive then the emulator attempts to access an external disk drive attached to the Serial Bus Adapter.
Running a program from DISK using the menu system - Use the DISK+INSERT DISKETTE pull-down menu to navigate through the OS/2 file system and select an *.D64 diskette image file to be inserted into the simulated commodore 1541-II disk drive.
Use the DISK+LOAD/RUN PROGRAM pull-down menu to scroll through the contents of the present diskette and select a program to be loaded and run. Once the program has been selected the emulator saves the default program name internally and sets the default device number to 8 and the default secondary address to 1 and goes through a simulated power down/up sequence. After that it starts the load and run of the selected program from device number 8 and secondary address 1 by depressing the SHIFT+TAB keys together.
Rerunning the last program from DISK manually - Press the F12 key to force the emulator to go through a simulated power down/up sequence. After that depress the SHIFT+TAB keys together to initiate the load and run from the last used program name, device number and secondary address.
Running a program from DISK manually - Type the LOAD "PROGRAM",8,1 command to load PROGRAM from diskette and type RUN to execute it. The typed in program name, device number and secondary address will be saved internally when the LOAD command is executed.
Saving a program to DISK manually - Type the SAVE "PROGRAM",8,1 command to save PROGRAM to diskette. The typed in program name, device number and secondary address will be saved internally when the SAVE command is executed. It is NOT possible to save PROGRAM to the diskette present in the simulated commodore 1541-II disk drive when the serial rom traps have been activated.
The tape device uses in reality the OS/2 file system. Only when a secondary address of 2 is used on a load operation then the data comes from the cassette present in the simulated commodore 1530-C2N datassette unit.
Running a program from TAPE using the menu system - Use the TAPE+INSERT CASSETTE pull-down menu to navigate through the OS/2 file system and select an *.T64 cassette image file to be inserted into the simulated commodore 1530-C2N datassette unit.
Use the TAPE+LOAD/RUN PROGRAM pull-down menu to scroll through the contents of the present cassette and select a program to be loaded and run. Once the program has been selected the emulator saves the default program name internally and sets the default device number to 1 and the default secondary address to 2 and goes through a simulated power down/up sequence. After that it starts the load and run of the selected program from device number 1 and secondary address 2 by depressing the SHIFT+TAB keys together.
Rerunning the last program from TAPE manually - Press the F12 key to force the emulator to go through a simulated power down/up sequence. After that depress the SHIFT+TAB keys together to initiate the load and run from the last used program name, device number and secondary address.
Running a program from TAPE manually - Type the LOAD "PROGRAM",1,2 command to load PROGRAM from the cassette present in the simulated commodore 1530-C2N datassette unit and type RUN to execute it. The typed in program name, device number and secondary address will be saved internally when the LOAD command is executed.
Saving a program to TAPE manually - It is NOT possible to save a program to the cassette present in the simulated commodore 1530-C2N datassette unit. Typing the SAVE "PROGRAM",1,2 command saves PROGRAM.PRG to the current drive and directory of the OS/2 file system instead. The typed in program name, device number and secondary address will be saved internally when the SAVE command is executed.
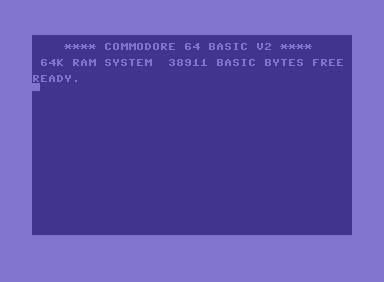
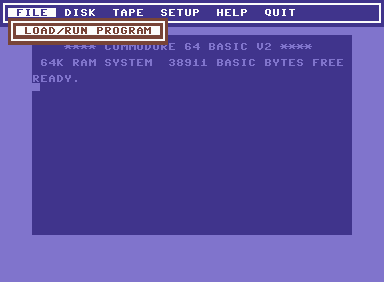
With the F9 key or the numpad INS key you toggle the popup menu system on/off. With the CURSOR LEFT and CURSOR RIGHT keys you switch between pull-down menus.
[File Pull-Down] [Disk Pull-Down] [Tape Pull-Down] [Setup Pull-Down] [Help Pull-Down] [Quit Pull-Down]
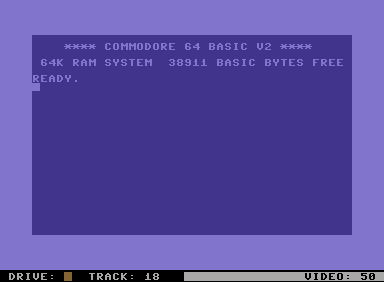
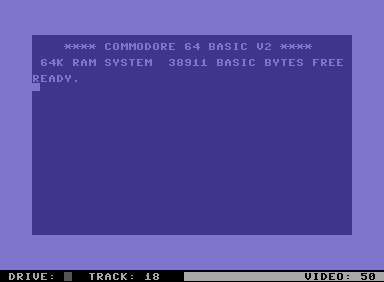
With the F10 key or the numpad DEL key you toggle the status bar on/off. With the SCROLL LOCK key you toggle the serial rom traps on/off. The brown square to the right of DRIVE: indicates that the cycle exact disk drive emulation has been activated. When it is yellow it indicates that the drive led is active. When it is grey it indicates that serial rom traps have been activated rather than the cycle based disk drive emulation.

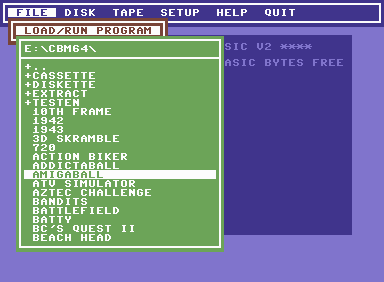
The FILE+LOAD/RUN PROGRAM pull-down menu enables you to navigate through the OS/2 file system and to select an *.PRG program file to be loaded and run. This navigation updates the current drive and directory of the OS/2 file system immediately. Once a program has been selected the emulator saves the default program name internally and sets the default device number to 1 and the default secondary address to 1 and goes through a simulated power down/up sequence. After that it starts the load and run of the selected program from device number 1 and secondary address 1 by depressing the SHIFT+TAB keys together.
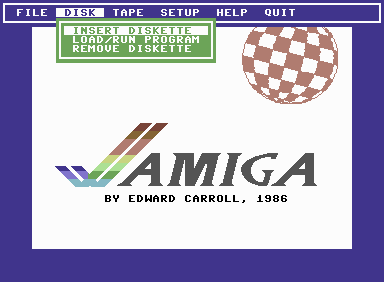
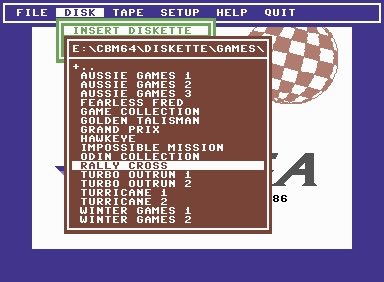
The DISK+INSERT DISKETTE pull-down menu enables you to navigate through the OS/2 file system and to select an *.D64 diskette image file to be inserted into the simulated commodore 1541-II disk drive.
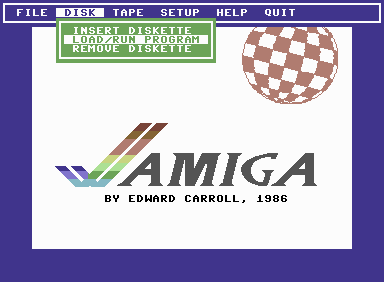
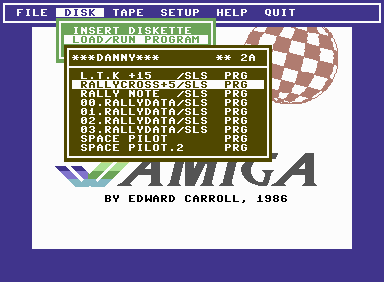
The DISK+LOAD/RUN PROGRAM pull-down menu enables you to scroll through the contents of the present diskette to select a program to be loaded and run. Once a program has been selected the emulator saves the default program name internally and sets the default device number to 8 and the default secondary address to 1 and goes through a simulated power down/up sequence. After that it starts the load and run of the selected program from device number 8 and secondary address 1 by depressing the SHIFT+TAB keys together.
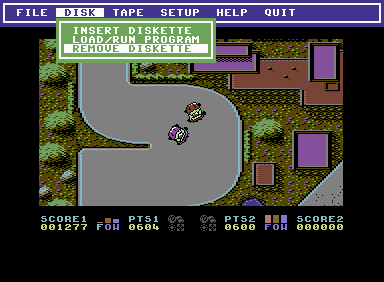
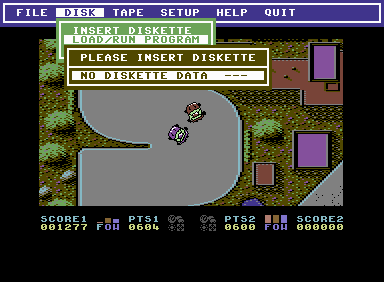
The DISK+REMOVE DISKETTE pull-down menu enables you to eject a possibly present diskette from the simulated commodore 1541-II disk drive. As you can see you are prompted to insert a diskette once you try to load and run a program from an empty disk drive.
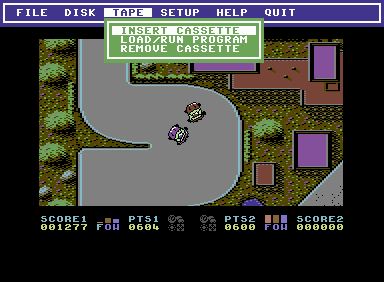
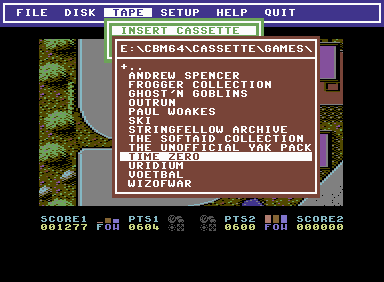
The TAPE+INSERT CASSETTE pull-down menu enables you to navigate through the OS/2 file system and to select an *.T64 cassette image file to be inserted into the simulated commodore 1530-C2N datassette unit.
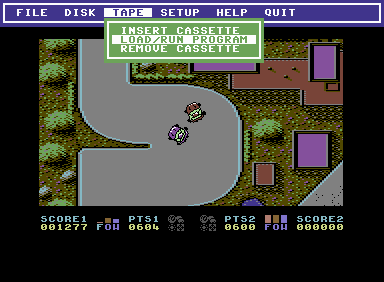
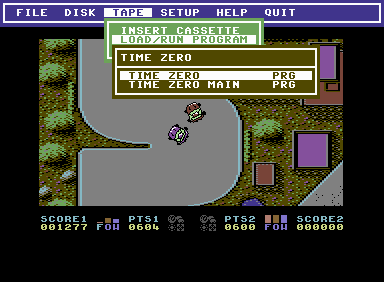
The TAPE+LOAD/RUN PROGRAM pull-down menu enables you to scroll through the contents of the present cassette to select a program to be loaded and run. Once a program has been selected the emulator saves the default program name internally and sets the default device number to 1 and the default secondary address to 2 and goes through a simulated power down/up sequence. After that it starts the load and run of the selected program from device number 1 and secondary address 2 by depressing the SHIFT+TAB keys together.
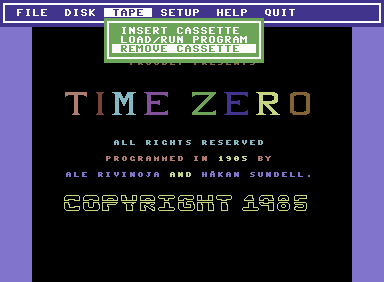
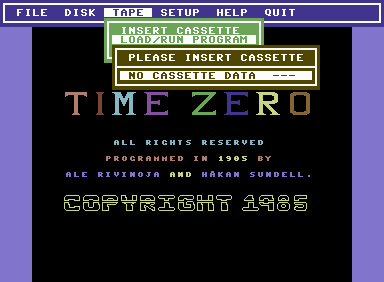
The TAPE+REMOVE CASSETTE pull-down menu enables you to eject a possibly present cassette from the simulated commodore 1530-C2N datassette unit. As you can see you are prompted to insert a cassette once you try to load and run a program from an empty datassette unit.
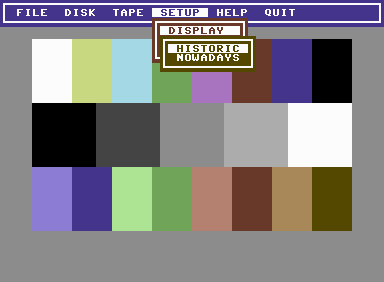
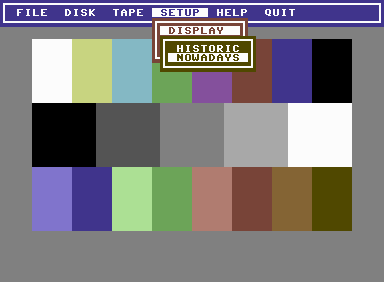
The SETUP+DISPLAY pull-down menu enables you to select the color set to be used by the emulator. Select HISTORIC to use the color set with only four luminance levels as present in the older C64 models or select NOWADAYS to use the color set with eight luminance levels as present in the newer C64 models. As you can see the color switching takes place immediately.
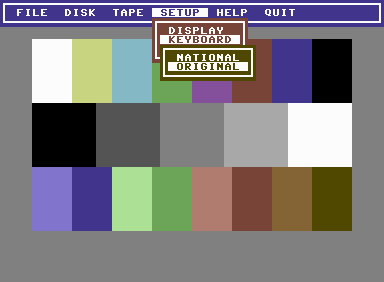
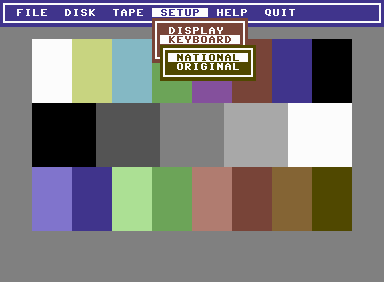
The SETUP+KEYBOARD pull-down menu enables you to select the keyboard layout to be used by the emulator. Select ORIGINAL to use the keyboard layout that mimics the C64 keyboard layout as much as possible or select NATIONAL to use the keyboard layout according to the engravings on the attached keyboard. The keyboard selection takes place immediately and may be viewed using the HELP+KEYBOARD pull-down menu. For more details see the Original Keyboard and the National Keyboard sections.
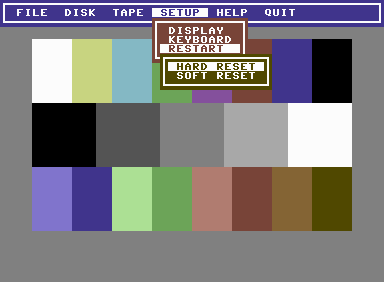
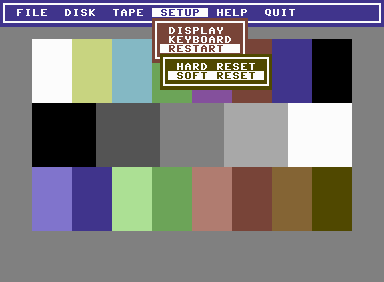
The SETUP+RESTART pull-down menu enables you to restart the emulator into a predetermined reset state. Select HARD RESET and press the ENTER key to force the emulator to go through a simulated power down/up sequence. Select SOFT RESET and press the ENTER key to force the emulator to go through a simulated hardware reset sequence.
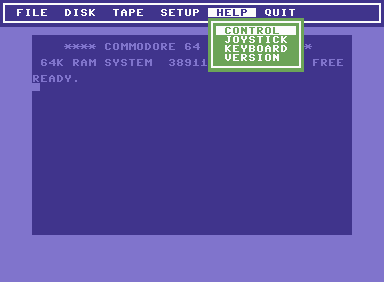
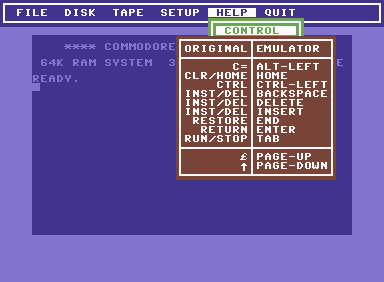
The HELP+CONTROL pull-down menu shows you how various control keys on the C64 keyboard are mapped to corresponding control keys on the PC keyboard. In addition it shows the odd mapping of two commodore keys which could not be placed on more appropriate places on the PC keyboard. Pressing the ENTER key toggles the displayed information on/off.
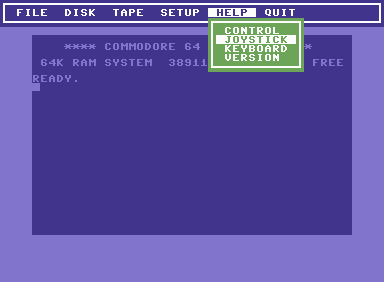
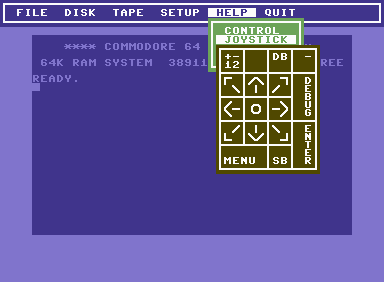
The HELP+JOYSTICK pull-down menu shows you how the joystick simulation uses the keys present on the numeric keypad for the keyboard joystick support. Pressing the ENTER key toggles the displayed information on/off.
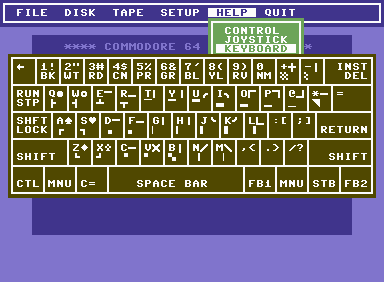
The HELP+KEYBOARD pull-down menu shows you the current keyboard layout used by the emulator. Pressing the ALT-LEFT and SHIFT keys together switches the displayed keyboard layout from using set 1 (upper case) to set 2 (lower case) and vice versa. Pressing the ENTER key toggles the displayed information on/off. For more details see the Original Keyboard and the National Keyboard sections.
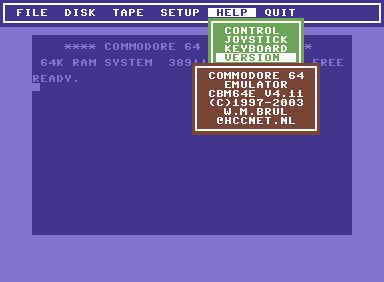
The HELP+VERSION pull-down menu shows you the emulator version and the email address of the program developer. Pressing the ENTER key toggles the displayed information on/off.
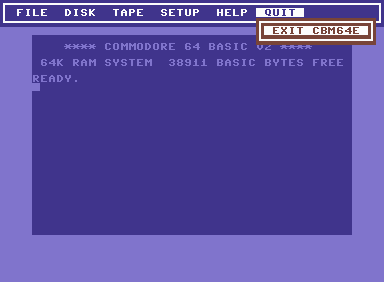
The QUIT+EXIT CBM64E pull-down menu enables you to quit processing.
When you press and release the ENTER key the emulator exits back to OS/2.
The keyboard emulation uses an original and a national keyboard layout. The national keyboard layout conforms to the layout of the United States (103) keyboard but the emulater has been designed with national language support in mind and all language specific elements reside in the initialization file.
The emulator may be switched to use the original keyboard layout via the SETUP+KEYBOARD pull-down menu. The switching is done immediately and is accomplished by restoring the keyboard tables in the original C64 rom code. The HELP+KEYBOARD pull-down menu shows the original layout as follows:

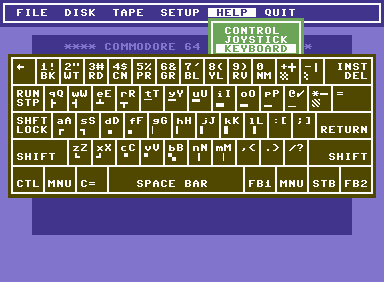
Pressing the ALT-LEFT and SHIFT keys together switches the displayed keyboard layout from using set 1 (upper case) to set 2 (lower case) and vice versa. Graphics shown at the upper right for a certain key require the SHIFT key to be used whereas graphics at the lower left require the ALT-LEFT key to be used when you want to enter that particular graphic character.
The emulator may be switched to use the national keyboard layout via the SETUP+KEYBOARD pull-down menu. The switching is done immediately and is accomplished by modifying the keyboard tables in the original C64 rom code. The HELP+KEYBOARD pull-down menu shows the national layout as follows:
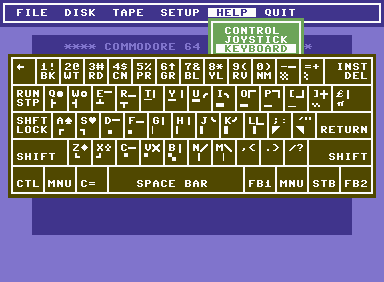
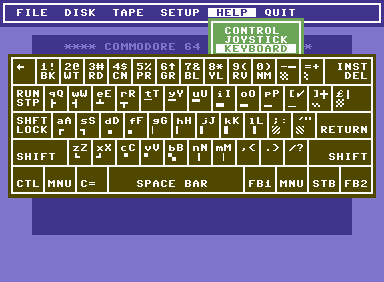
Pressing the ALT-LEFT and SHIFT keys together switches the displayed keyboard layout from using set 1 (upper case) to set 2 (lower case) and vice versa. Graphics shown at the upper right for a certain key require the SHIFT key to be used whereas graphics at the lower left require the ALT-LEFT key to be used when you want to enter that particular graphic character.
The joystick emulation uses the numeric keypad, analog joysticks connected to the game port and original commodore joysticks connected with some extra hardware to the parallel port. To swap joystick A at control port 1 with joystick B at control port 2 and vice versa press the NUM LOCK key.
[Keyboard Joysticks] [Game Port Joysticks] [Original Joysticks]
The keyboard joystick uses the numeric keypad.
The HELP+JOYSTICK pull-down menu shows this as follows:

With NUM LOCK off, the numpad joystick acts as
joystick B connected to control port 2.
The game port joystick support enables the use of analog joysticks connected to the game port. The GAMEDD.SYS device driver from GAMEDD2.ZIP must have been specified in CONFIG.SYS and thus be active when OS/2 was started. The emulator calibrates the joysticks automatically while these are being used and restarts that calibration whenever it goes through a simulated hardware reset or power down/up sequence.
The original joysticks may be connected to the parallel port via some extra hardware as shown below:

This schematic is compatible with the Serial Bus Adapter. No extra pull-up resistors are required when used in combination with the Serial Bus Adapter. The diodes need to have a low voltage drop when conducting so these have to be schottky type such as 1N5819 or BAT85. I myself used germanium diodes. The DB25 connector and the DB9 connectors are male.
To use the extra hardware connected to the parallel port, that port has to be set up in the BIOS as the most simple unidirectional port by using the setting SPP (Standard Parallel Port) which may have been labeled COMPATIBLE, NORMAL or STANDALONE. As an alternative that port may be set up as a bidirectional port by using the settings ECP (Extended Control Port) or PS/2 which may have been labeled ENHANCED or EXTENDED.
The emulater recognizes only one parallel port for attached hardware and will detect that port automatically by reading the status port of the standard LPTs as defined by the basic i/o addresses of 278, 2BC, 378 and 3BC respectively.
The Serial Bus Adapter has been designed to connect original commodore disk drives and printers to the parallel port. When the serial rom traps are active and there is no diskette present in the simulated commodore 1541-II disk drive then the emulator attempts to access the external devices attached to the Serial Bus Adapter.
Special adapter software may be written to directly access these external devices independent upon the presence of the serial rom traps and the state of the simulated commodore 1541-II disk drive. The Extract Diskette program has been written using that technique.
[Adapter Hardware] [Adapter Firmware] [Adapter Software] [Extract Diskette]
The serial bus devices may be connected to the parallel port via some extra hardware as shown below:
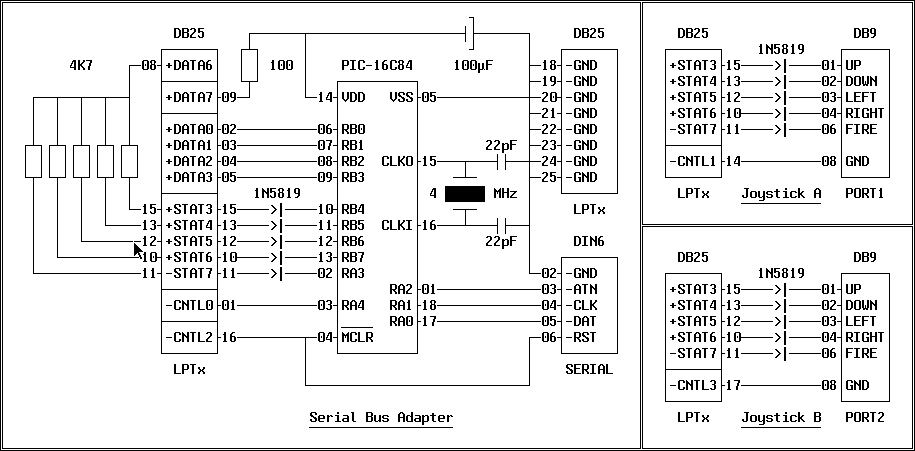
This schematic is compatible with the original joysticks. No extra pull-up resistors are required when used in combination with the original joysticks. The diodes need to have a low voltage drop when conducting so these have to be schottky type such as 1N5819 or BAT85. I myself used germanium diodes. The DB25 connector and the DB9 connectors are male. The DIN6 connector is female.
To use the extra hardware connected to the parallel port, that port has to be set up in the BIOS as the most simple unidirectional port by using the setting SPP (Standard Parallel Port) which may have been labeled COMPATIBLE, NORMAL or STANDALONE. As an alternative that port may be set up as a bidirectional port by using the settings ECP (Extended Control Port) or PS/2 which may have been labeled ENHANCED or EXTENDED.
The emulater recognizes only one parallel port for attached hardware and will detect that port automatically by reading the status port of the standard LPTs as defined by the basic i/o addresses of 278, 2BC, 378 and 3BC respectively.
The adapter firmware has been assembled using Microchip MPASM v01.50 and the resultant output file CBM64C.HEX has been provided in INHX8M format. I have programmed my own Microchip PIC16C84 microcontroller using the Microchip PICSTART Plus Development System specifically designed for use in firmware development. Of course other pic programmers may be used.
The $B2 opcode has been extended to provide output to the serial devices as follows:
| service routine | mnemonics | description | accumulator |
|---|---|---|---|
| $B2,$01,$B2,$0D | LISTEN,WSTAT | command device to receive setup data | device number |
| $B2,$03,$B2,$0D | SECOND,WSTAT | command device how to process data bytes | setup command |
| $B2,$05,$B2,$0D | CIOUT,WSTAT | send next data byte to listening devices | data byte |
| $B2,$07,$B2,$0D | WREOI,WSTAT | send last data byte to listening devices | |
| $B2,$08,$B2,$0D | UNLSN,WSTAT | command all listening devices to stop |
The $B2 opcode has been extended to obtain input from the serial devices as follows:
| service routine | mnemonics | description | accumulator |
|---|---|---|---|
| $B2,$02,$B2,$0D | TALK,WSTAT | command device to receive setup data | device number |
| $B2,$04,$B2,$0D | TKSA,WSTAT | command device how to prepare data bytes | setup command |
| $B2,$09,$B2,$0C | ACPTR,RSTAT | receive next data byte from talking device | data byte |
| $B2,$06,$B2,$0D | UNTLK,WSTAT | command all talking devices to stop |
The $B2 opcode has been extended to additionally support turbo transfers as follows:
| service routine | mnemonics | description | accumulator |
|---|---|---|---|
| $B2,$0A,$B2,$0C | TBGET,RSTAT | turbo get next data byte from talking device | data byte |
| $B2,$0B,$B2,$0D | TBPUT,WSTAT | turbo put next data byte to listening device | data byte |
With this program you may extract diskette image data from a real commodore 1541-II disk drive connected to the Serial Bus Adapter. The extracted diskette image data will be written to the OS/2 file system as an *.SEQ sequential file so you have to rename it later on to an *.D64 file.
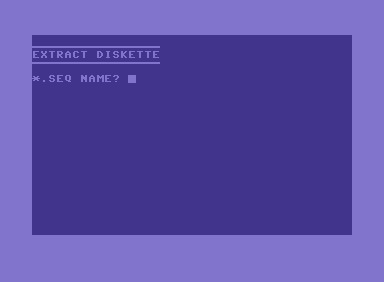
When you double click on the EXTRACT.T64 tape image file which contains the basic front-end EXTRACT.PRG together with the assembler back-end EXTRACTX.PRG then you will be prompted to provide the name of the *.SEQ file as shown below together with its successfull completion:
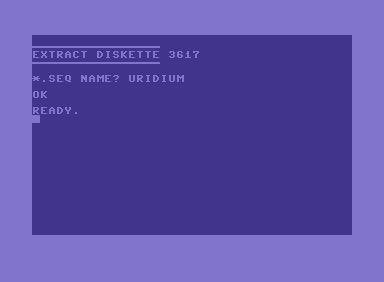
The OK message indicates that the extract has been completed successfully. The extracted diskette data has been written to the current directory of the OS/2 file system as the URIDIUM.SEQ file. When you rename it to URIDIUM.D64 then it becomes available as a diskette ready to be inserted into the simulated commodore 1541-II disk drive.